How to set up a FiveM whitelist: Discord roles and approval via txAdmin
Almost every serious roleplay server runs a whitelist: only players you know, or who have filled in a short application, get in. Not because it looks fancy, but because it is the cheapest way to keep trolls, kids with a cracked client and random passers-by out. The good news: you don't need a separate script for it. txAdmin, which runs by default on every FiveM server at MC-Node, has a built-in whitelist that can talk to your Discord. In this article you'll have it set up properly in fifteen minutes.
What a whitelist does and doesn't do
A whitelist decides one thing: is this player allowed to connect, yes or no. It is not an anticheat and not a ban list. Someone you let in who then misbehaves gets thrown out with a ban; someone you don't know yet simply doesn't get in. Mixing those two up is the first mistake we see: admins switch the whitelist on, painstakingly add everyone to it, and are then surprised that there are still cheaters walking around. The whitelist is the front door; moderation and anticheat are the security inside.
The txAdmin whitelist modes
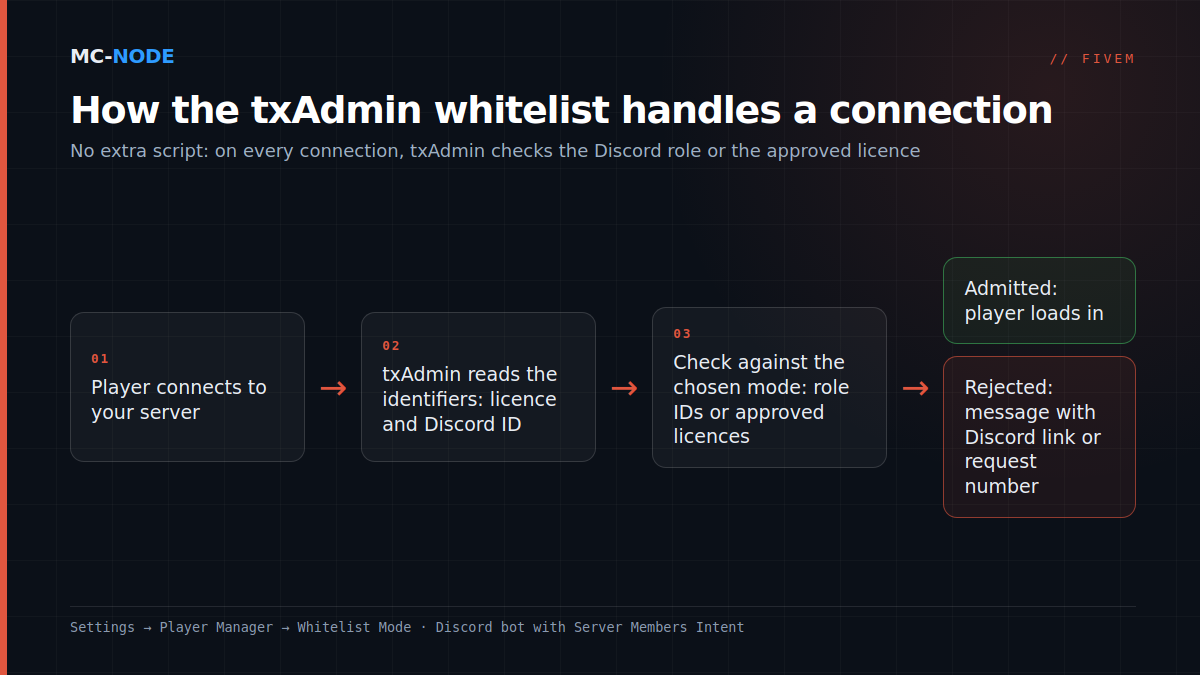
In txAdmin, go to Settings → Player Manager. That is where the Whitelist Mode setting lives, in these flavours:
| Mode | Who gets in | When it's useful |
|---|---|---|
| Disabled | Everyone | Public servers, testing phase |
| Admin-only | Only txAdmin admins | While you're still building your server |
| Approved License | Players you approve manually | Small community without a Discord requirement |
| Discord Member | Anyone who is in your Discord server | Open community with Discord as its hub |
| Discord Roles | Only members with a specific role | Roleplay with an application process |
For roleplay, Discord Roles is the standard choice: your application process already runs through Discord anyway, and assigning a role is a single click for your staff. Approved License is the fallback if you don't want to require Discord — it works on the player's FiveM licence (the license: identifier).
Step 1: link the Discord bot
For the two Discord modes, txAdmin has to be able to read your Discord server. It does that with a bot of its own:
- Go to the Discord Developer Portal, create a new application (name it after your server) and add a bot under Bot. Copy the token; you only get to see it once.
- On that same Bot page, switch on Server Members Intent. This is the step that gets skipped most often: without this intent the bot cannot see the member list or the roles, and the whitelist rejects everyone.
- In your Discord client, enable Developer Mode (Settings → Advanced), right-click your server and choose Copy Server ID. That is your Guild ID.
- In txAdmin: Settings → Discord, paste the token and the Guild ID, save, and invite the bot using the link txAdmin shows you.
Is the bot's status message showing up in Discord? Then the link works and you can carry on.
Step 2: set the mode and the roles
Back to Player Manager. Choose Discord Roles and paste the IDs of the roles that grant access (right-click the role under Server Settings → Roles → Copy Role ID). You can enter several, for example Whitelisted, Staff and Police; any one of those roles is enough. Below that, fill in the rejection message. That is the text a player who isn't allowed in sees on their connection screen, so put something useful in it: your Discord invite link and where the application form is. "You are not whitelisted" with no next step costs you players.
Approved License: approving on request
If you go for Approved License, an unknown player gets a rejection with a request number when they connect. They send that number to your staff, and you approve the request in txAdmin (Players → Whitelist) or, if the Discord bot is linked, with the bot's whitelist command in your Discord. From that moment on, their access is tied to their licence, even if they switch Discord accounts. It is a little more manual work than roles, but there is no Discord requirement and you can see exactly who you let in and when.
The mistakes almost everyone makes the first time
- Player has no Discord identifier. FiveM only passes on a Discord ID if the Discord app is open on the player's PC. If Discord is closed or only running in the browser, txAdmin sees no ID and the player is rejected, however correct their role is. Put this in your application instructions.
- Forgotten intent. Without Server Members Intent, the bot reports that it cannot fetch roles. Switch it on, then restart the bot in txAdmin.
- Role ID versus role name. txAdmin wants the numeric ID, not the name. A renamed role keeps working; a role you delete and recreate does not.
- Locking yourself out. Admins in txAdmin always get in, but your staff members without a txAdmin account do not. Give them a whitelisted role before you switch over.
- Testing with your own account. Always test with a second account that is definitely not in your Discord. Only then do you know for certain that the rejection works and that your message is readable.
When you do want a script
The built-in whitelist covers nine out of ten servers. A separate script only becomes interesting when you want more than yes/no: automatically linking ACE permissions to Discord roles, for example (the combination of a Discord API resource with an ACE permissions resource is popular for that), or an application form that writes straight into your database. Do bear in mind that every extra script in the connection path is one more place where things can go wrong: if the Discord API drops out for a moment, everyone is locked out. txAdmin handles that gracefully; a home-made playerConnecting check often doesn't.
On your MC-Node server
txAdmin runs by default on every FiveM package with us, from €1.75 per month for the Small package; if you aren't using it yet, read how to enable txAdmin. The whitelist itself costs nothing extra and works on every package. A short guide to the basic steps is in our knowledge base too: using a whitelist. If you run a bigger community and want to use roles for in-game permissions as well, read on about ACE permissions.