Installing a Minecraft server on a VPS: Ubuntu, Java 21 and systemd
Most people who want a Minecraft server are better off with a game server package: panel, backups, one-click updates. But there is a group for whom a VPS is the better choice: you want several small servers behind a proxy, you want to run your own scripts and cron jobs, or you simply want to learn how it works under the bonnet. This guide sets up a Paper server on Ubuntu 24.04, as a systemd service that starts by itself after a reboot and saves the world cleanly on shutdown. Allow half an hour.
Which VPS?
Minecraft runs on one core and wants a fast one. So choose the Normal line with the AMD EPYC 7443P (up to 4.0 GHz): HEN-N-02 with 4 GB for €5.30 per month is a good start for 5 to 10 players, HEN-N-03 with 4 vCores and 8 GB for €9.50 if you want plugins or several servers. The budget line on the older Xeon works too, but you'll notice the lower clock speed in the tick rate as soon as it gets busy. Keep 1 GB free for the operating system: on a 4 GB VPS you give the server 3 GB.
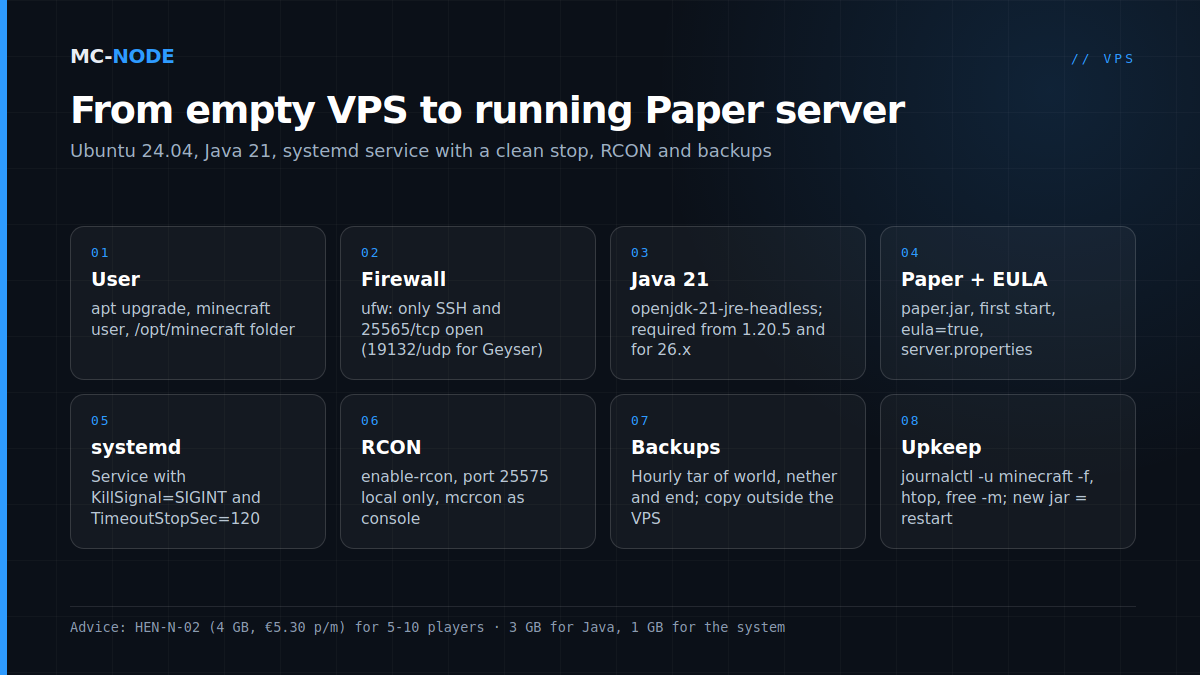
Step 1: log in, update, create a separate user
Log in via SSH (here's how to connect) and start with updates and a user without root privileges. The server will run under that user later, so a malicious plugin doesn't immediately own your whole machine.
apt update && apt upgrade -y
adduser --disabled-password --gecos "" minecraft
mkdir -p /opt/minecraft && chown minecraft:minecraft /opt/minecraft
Step 2: firewall
ufw allow OpenSSH
ufw allow 25565/tcp
ufw enable
Only SSH and the Minecraft port are open. If you want Geyser for Bedrock players later, 19132/udp gets added. RCON (step 6) is something you deliberately do not open to the outside world.
Step 3: Java 21
Minecraft 1.20.5 and newer, including the 26.x versions, require Java 21. On Ubuntu 24.04 that is one line; our knowledge base has a separate guide in case you're on a different distribution.
apt install -y openjdk-21-jre-headless
java -version
Step 4: download Paper and accept the EULA
Download the latest Paper build for your Minecraft version from the PaperMC site and put it in /opt/minecraft as paper.jar. Start it once as the minecraft user; it creates the files and stops at the EULA.
su - minecraft
cd /opt/minecraft
java -Xms3G -Xmx3G -jar paper.jar --nogui
sed -i 's/eula=false/eula=true/' eula.txt
Setting -Xms and -Xmx to the same value stops Java from having to request memory over and over again. More flags, such as the well-known garbage collector tuning, can come later; with ten players you won't notice the difference. Now also edit server.properties: leave online-mode=true as it is, set view-distance to 8, and add a motd. What the other lines do is in server.properties explained.
Step 5: the systemd service
This is the step that separates a VPS server from a "screen session I leave open". Create /etc/systemd/system/minecraft.service:
[Unit]
Description=Minecraft (Paper)
After=network-online.target
Wants=network-online.target

[Service]
User=minecraft
WorkingDirectory=/opt/minecraft
ExecStart=/usr/bin/java -Xms3G -Xmx3G -jar paper.jar --nogui
Restart=on-failure
RestartSec=10
KillSignal=SIGINT
TimeoutStopSec=120

[Install]
WantedBy=multi-user.target
systemctl daemon-reload
systemctl enable --now minecraft
systemctl status minecraft
journalctl -u minecraft -fKillSignal=SIGINT is the most important line: the Minecraft server catches that signal and saves all worlds before it stops, exactly like stop in the console. Without that line it gets a hard signal on a reboot and you risk a corrupted chunk. TimeoutStopSec gives it two minutes for that; a big world sometimes needs it.
Step 6: a console via RCON
A service has no screen to type commands into. The clean solution is RCON: in server.properties set enable-rcon=true, rcon.port=25575 and a long rcon.password, and install an RCON client such as mcrcon on the VPS. Because the firewall doesn't open that port, RCON is only reachable locally, and that is exactly right. An alternative many admins find more comfortable: starting the server in screen or tmux from the service, so that screen -r shows you the real console. That works, but the stop logic becomes more complicated; start with RCON.
Step 7: backups
Our VPSes come with backups of the whole machine included, but a world is something you want to save more often and more specifically. A cron job that packs up the world folders every hour is enough:
0 * * * * tar -czf /opt/backups/world-$(date +\%Y%m%d-%H).tar.gz -C /opt/minecraft world world_nether world_the_endAdd a line that cleans up files older than seven days, and copy the folder now and then to somewhere other than the VPS itself. A backup on the same disk as the server is not a backup.
Step 8: updating and keeping an eye on things
Updating means dropping in the new paper.jar and running systemctl restart minecraft. Check the plugins before every update: they have to support the new version. Keep an eye on the machine with htop and free -m; if less than a few hundred MB stays free, it's time for a bigger package, which you can do monthly.
Honestly: when you shouldn't do this
Everything above comes ready-made with a Minecraft game server: panel with console, one-click backups, version switching, plugin installation, and DDoS protection on the game port. That starts at €0.50 per month and costs about €1.10 per GB, which for a single server is cheaper than a VPS of comparable size. The VPS only wins with several servers, a Velocity proxy, your own software alongside it, or simply the wish to do it yourself. If you want the best of both worlds, look at Pterodactyl on your own VPS: a panel you manage yourself.